Activating TallyPrime: A Complete Guide
Step 1: Open Tally Prime and Choose Activation Option
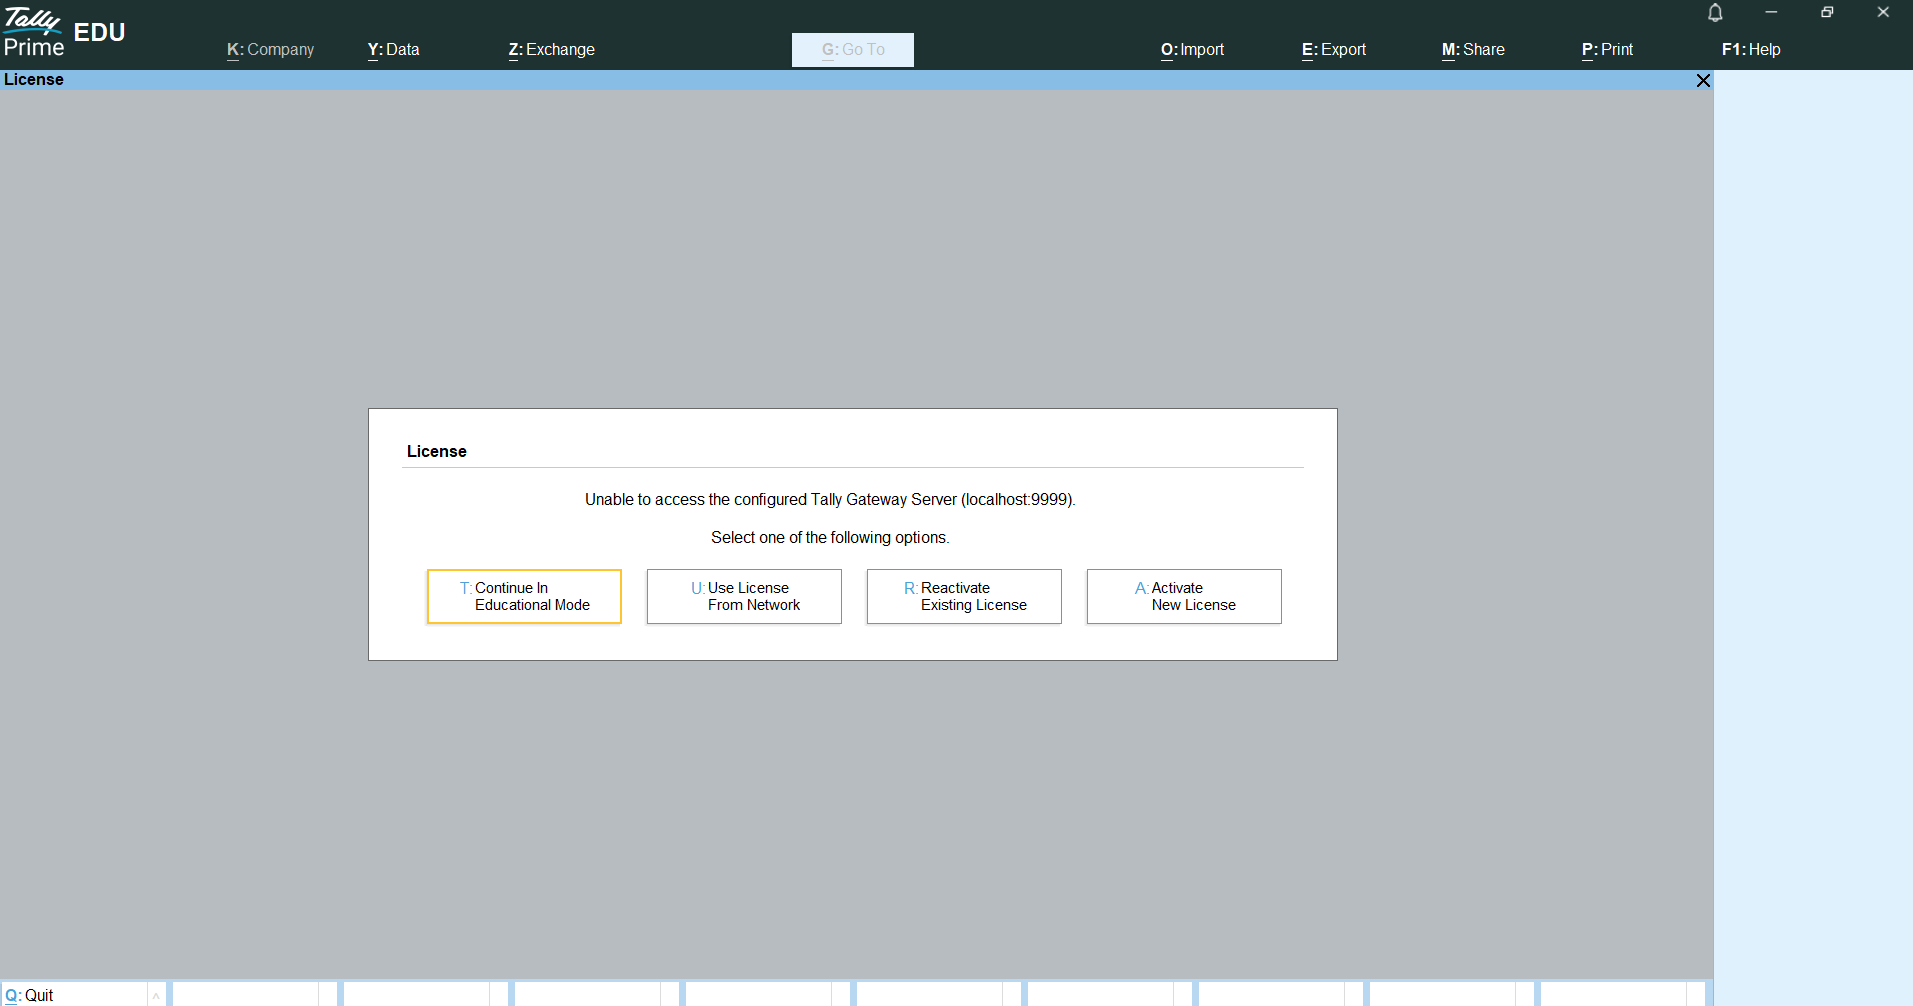
When you launch Installed TallyPrime for the first time, the activation screen will appear. You will see three options:
- Continue in Educational Mode
- Use License From Network
- Reactivate Existing License
- Activate New License
If you are a new user, select Activate New License to continue.
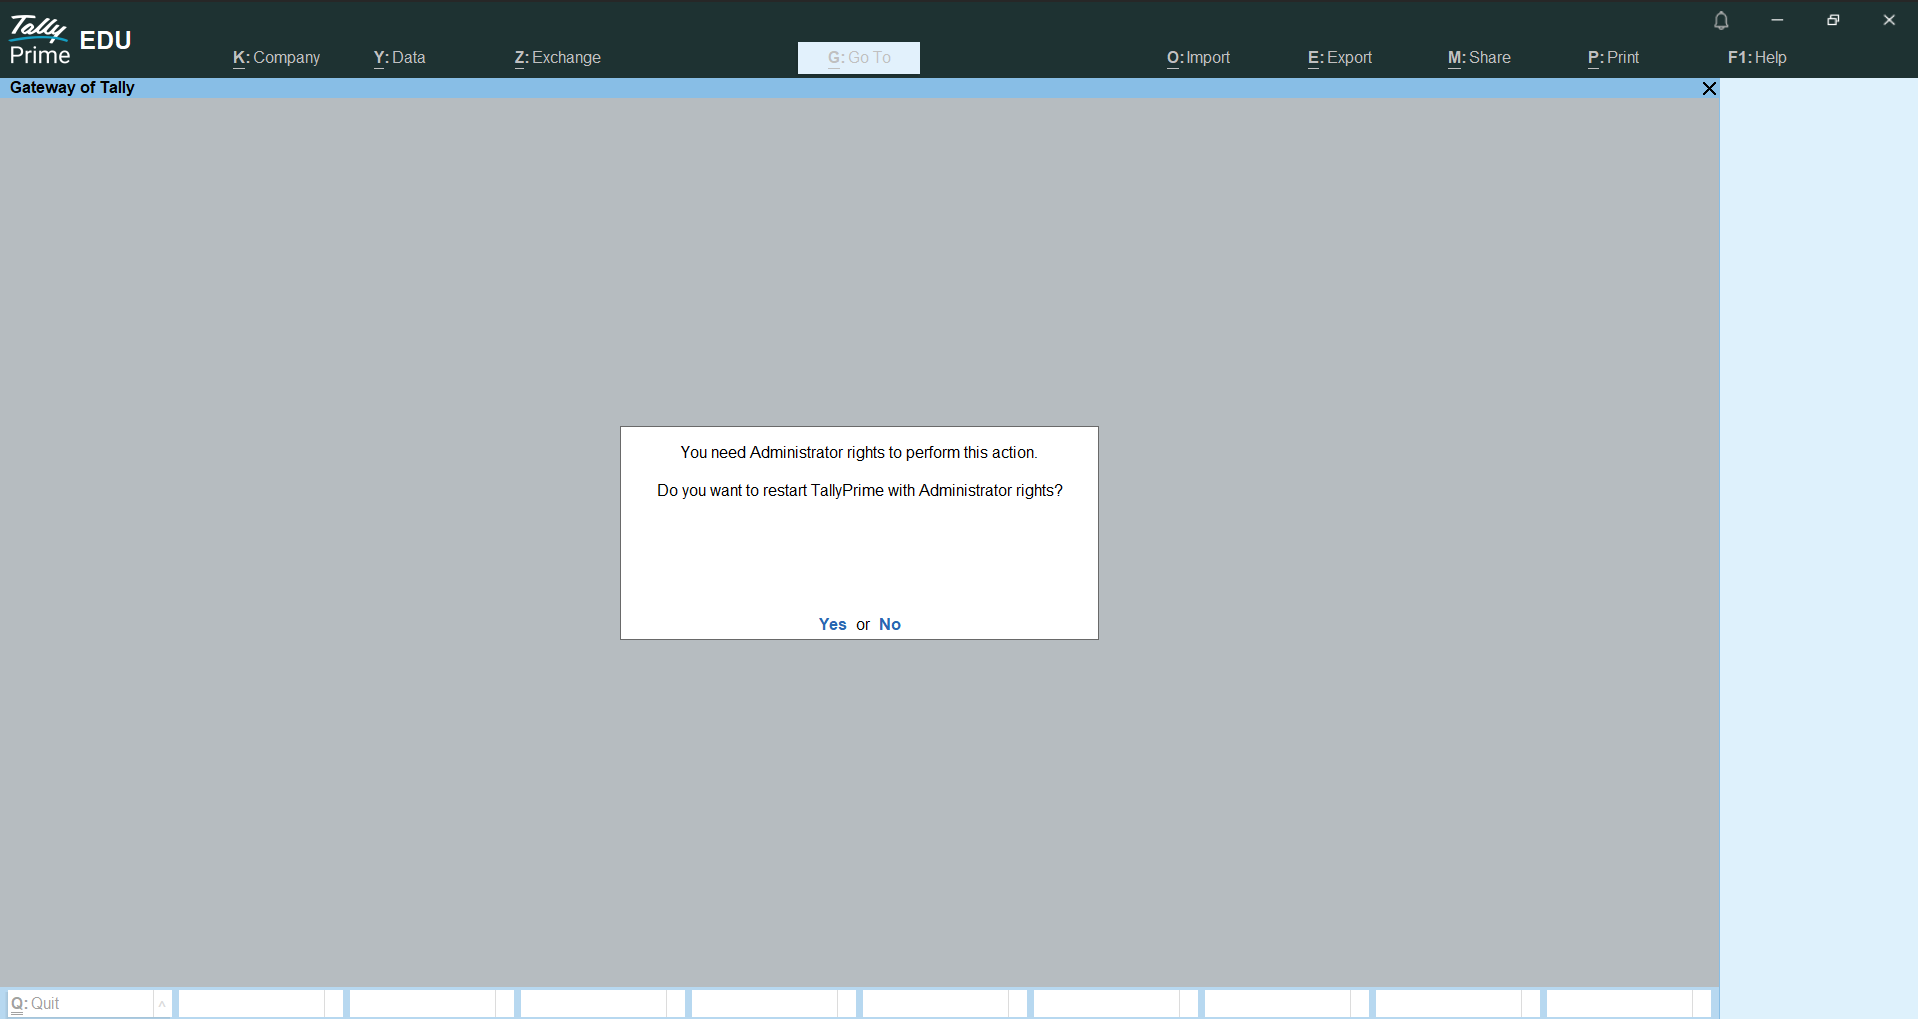
Grant administrator permission
After selecting Activate License, Tally Prime needs administrator rights to continue.
- If Tally Prime is not already running as administrator, a message will appear asking to restart Tally Prime with administrator rights.
Click Yes to restart and continue the activation process.
- If Tally Prime is already running as administrator, this message will not appear, and you will be taken directly to the next activation step.
Administrator permission is required to verify and activate the license successfully.
Step 3: Enter Your License Key
If TallyPrime was already opened using Run as administrator, it will not restart. You will be taken directly to the license entry screen.
If Tally Prime was not running as administrator, it will restart once and then open with administrator permission.
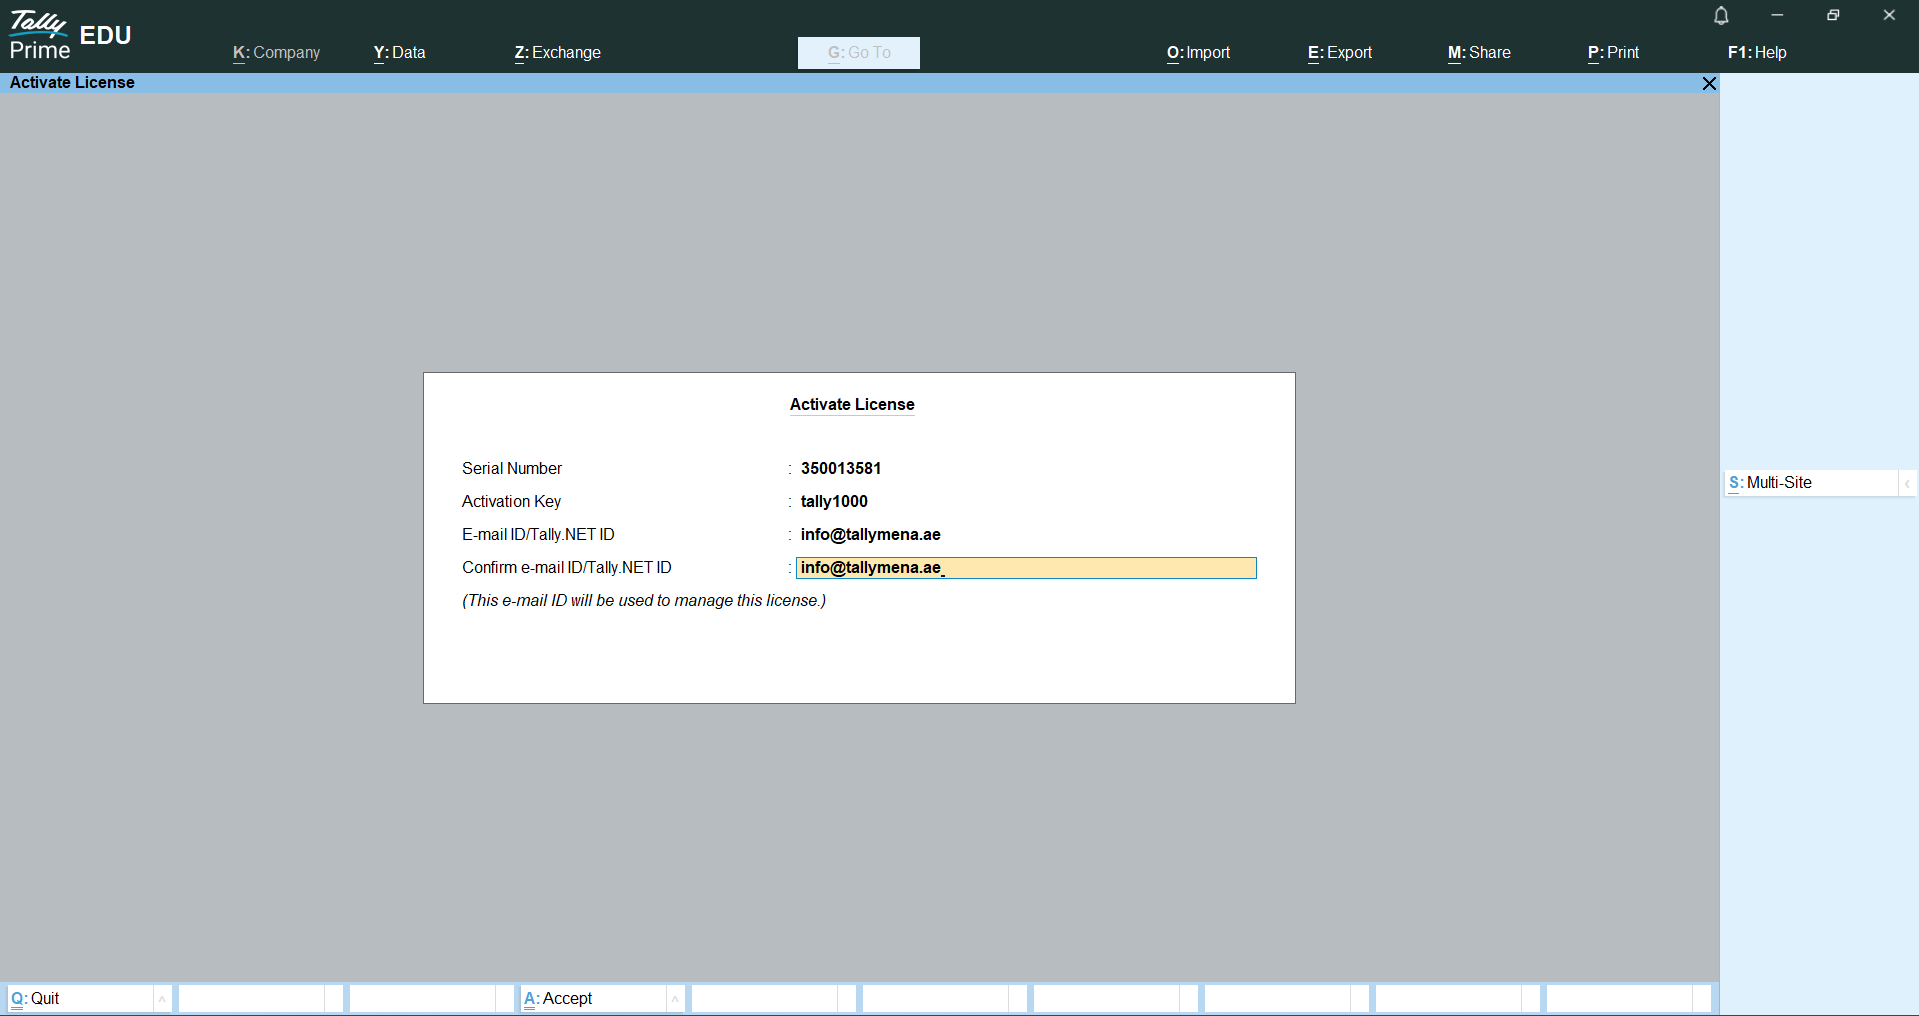
On the activation screen:
- Serial Number
- Activation Key
- Email ID or Tally.NET ID
You may need to enter the email ID again for confirmation.
Press Enter to proceed. License verification will begin.

Step 4: Unlock the license
If the details are correct, the Unlock License screen will appear.
Enter the Unlock Key sent to your registered email address.
For example, check the inbox of the email used during activation. Here its ([email protected])
Press Enter to unlock your license.

Step 5: Activation successful
If all steps are completed correctly, you will see an activation success message. Your Tally Prime license is now active.
Congratulations! Your License is activated.
If you face any activation issues, Tally Mena support can help you troubleshoot and resolve them.